How to Setup Low cost Video Conferencing System for Home
Purpose:
To have a low cost Video Conferencing Solution which can work on Normal TV Set and do not need login and configurations like Skype or Zoom does. It will help Kids and aged persons to use it easily on just a push of a button to be ready for video chat on a home TV. Low Cost is another factor.Video calling is an option for most people, however, as some old age parents are not in the position to learn how to use a computer, the only option was to build a system that would be as simple as possible for them to operate, wouldn't need maintenance, and it would be inexpensive as well. Additionally, the system had to be able to be connected to a television screen, so they will be able to comfortably use it and they won't have to look into a tiny phone screen in order to see .
Some SMART TV have Skype feature but camera for that much costly than the raspberry system. Also with no proper support and updates it does not give much quality on Smart TV. Benefits summary:
- Low cost under $100 USD (INR 4500) HD VC Solution
- Easy to operate by Kids and Seniors on push of a button
- No logins required
- Multiparty conferencing
- Based on Video Relay (SFU) unlike traditional MCU System
- Content and Screen sharing possible
- Can be connected to any Windows/Linux/Mac/Android device through Jitsi
- Can be connected to Landline/Mobile number
 |
| Here is kids palm size Raspberry Pi |
Requirement:
I bought following :- Raspberry Pi 3 Model B+ (Latest released in March 2018 on Pi Day)
- Transparent case with heat sinks : Raspberry Pi 3 Model B tends to get hot easily on video calls.
- 16 GB Memory Card - Class 10 for low latency
Things which i suppose people generally have:
- Home Wifi Connection
- Any TV LED/LCD having HDMI input
- HDMI cable for connecting to TV
- Old MicroUSB Charger / Phone adapter to power the raspberry Pi. Raspberry Pi 3 Model B needs an output of 5.1V and 2.5A, My Samsung mobile charger worked.
- Any old USB Camera or you can buy usb/blutooth inbuit mic webcam under INR 700
- Normal MIC

FullPageOS is a Raspberry Pi distribution to display one webpage in full screen. It includes Chromium out of the box and the scripts necessary to load it at boot. This repository contains the source script to generate the distribution out of an existing Raspbian distro image. FullPageOS is a fork of OctoPi

- Loads Chromium at boot in full screen
- Webpage can be changed from /boot/fullpageos.txt (Here we are going to put our url for default video conferencing room to start when boot completes)
- Default app is FullPageDashboard, which lets you add multiple tabs changes that switch automatically.
- Ships with preconfigured X11VNC, for remote connection (password 'raspberry')
- Configure your WiFi by editing fullpageos-wpa-supplicant.txt on the first partition of the flashed card when using it like a flash drive. (It will help us to connect wifi automatically after boot)
- Log into your Pi via SSH (it is located at fullpageos.local if your computer supports bonjour or the IP address assigned by your router), default username is "pi", default password is "raspberry", change the password using the passwd command and expand the filesystem of the SD card through the corresponding option when running sudo raspi-config.
Writing THE OS in memory card:
Unzip the image and install it to an SD card like any other Raspberry Pi image.- Download the image (in zip) of FullPageOS from http://unofficialpi.org/Distros/FullPageOS/
If in doubt there is MD5 available to make sure the image is ok.

You will need to use an image writing tool to install the image you have downloaded on your SD card.
Etcher is a graphical SD card writing tool that works on Mac OS, Linux and Windows, and is the easiest option for most users. Etcher also supports writing images directly from the zip file, without any unzipping required. To write your image with Etcher:
- Download Etcher and install it. https://etcher.io/
- Connect an SD card reader with the SD card inside to any laptop/PC memory card port.
- Open Etcher and select from your hard drive the Raspberry Pi FullPageOS .img or .zip file you wish to write to the SD card.
- Select the SD card you wish to write your image to.
- Review your selections and click 'Flash!' to begin writing data to the SD card.
If you're not using Etcher , you'll need to unzip .zip downloads to get the image file (.img) to write to your SD card with some image writer.
I had used 16 GB micro SD card with SD Card reader to write the OS.
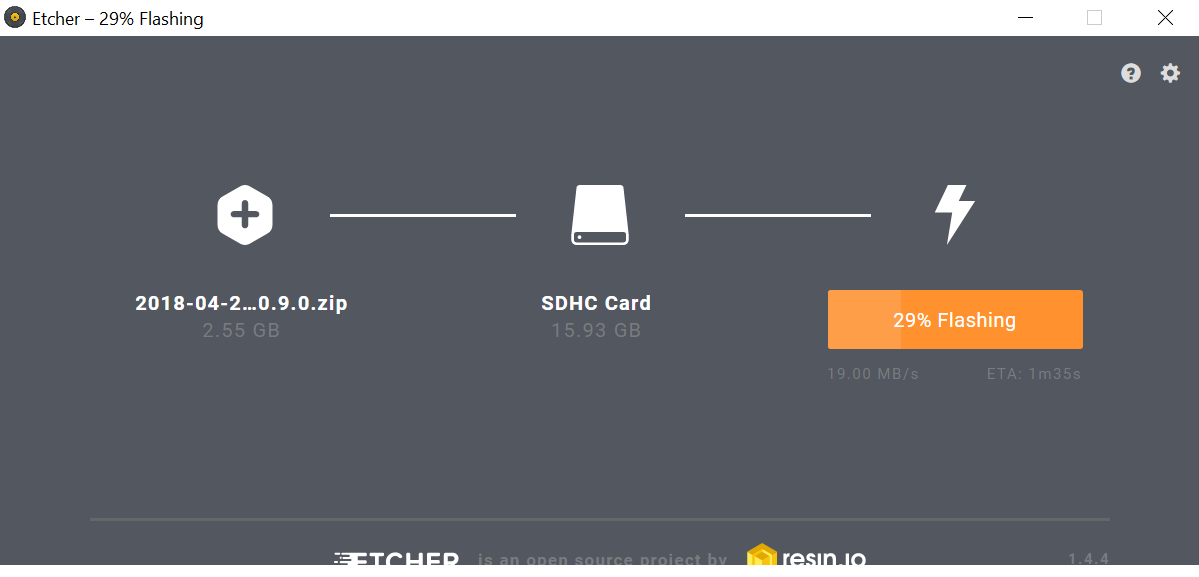
Open Etcher and give image file .zip path
Ensure SD card is selected. It will be auto detected.

Start Flashing. It will hardly take couple of minutes to make your SD card ready and bootable.
Now you are ready with FullPageOS in memory card.
Configuring the WiFi in FullPageOS:
You can do it after booting the Pi but here i am doing the configuration through my Laptop Only. Remove the just flashed SD Card and reinsert into PC. It will come under My Drive with Title Boot.Be careful to edit txt file with Windows Notepad or wordpad. It will mangle the configuration and it may not work so better use Notepad++ or atom text editor.
I used notepad ++ to open fullpageos-wpa-supplicant.txt for entering my wifi connection details.
Go to the line to change WPA/WPA2 wifi setting. Default is as follows:
## WPA/WPA2 secured
#network={
# ssid="put SSID here"
# psk="put password here"
#}
Un-comment the lines and enter your SSID and Password.
## WPA/WPA2 secured
network={
ssid="vaanya"
psk="Password"
}
Also ad Country=IN #India ''Change it to your country code

You can confirm WiFi settings from your modem/router setting page.

Configure Pi to force connect HDMI on boot
To force pi to connect your LED TV through HDMI , you have to make one more setting in config.txtand uncomment the hdmi_force_hotplug=1
(for older tv you need higher signal boost for hdmi that can be done using config_hdmi_boost = 4 (or higher) . I did not use this setting.
Configure the Default Page to Open on Browser
By default http://localhost/FullPageDashboard gets open. To change it edit the fullpageos.txt file and enter the URL of meet.jitsi meeting room e.g. https://meet.jit.si/Vaanya


Why i am using Jitsi as default Video Conferencing Solution over other technology is explained at bottom.

Save it. Till now we have done most of the work before booting up the PI OS. Same process can be done after boot on command line but i thought this was much easier and fast way. Here is that process:
Login via SSH using the following user and password; pi and raspberry. Now, configure FullPageOS like you do in Raspbian using sudo raspi-config.
Finally, edit the file /boot/fullpageos.txt which tells the OS which web address opens when Raspberry Pi and FullPageOS boot. Bear in mind FullPageOS let's user to browse any web page! Ok, there is no address field... which is not stopping anyone!
Boot the Pi from the SD card
As you have seen we did all configuration on SD card itself. Now your Pi is ready to boot without mouse and keyboard. Place the SD-card in your Pi and boot FullPageOS. Use any mobile charger adapter
The first time boot screen looks like this. It means everything is fine till now. Remember to plugin HDMI, Camera and Mic before plugin in power adapter.

It will boot in to Full Page Chromium OS and will load the first page which we configured to open the Jitsi Meeting.

You Full HD Video Conferencing Solution is ready. You can even share the content and screen on It or can join multi party Video Conferencing.

Reason for Using Jitsi as Video Conferencing Platform
Jitsi is an open source communicator that allows secure audio/video calls and conference. It includes Jitsi Video-bridge which relays video rather than mixing. It also provides improved scale with higher quality and lower latency in media transfer.- Open Source : Tweaks can be done according to the user requirement.
- High Quality multi-party video conference.
- Secure : Provides encryption of the data being exchanged.
- Use of Video-bridge : It is a star feature of Jitsi, which relays the content rather than mixing it. Relaying of the video saves the processing load at the video-bridge’s end.
WebRTC provides browsers and mobile applications with Real-Time Communications (RTC) capabilities via simple APIs.
Major components of WebRTC are:
- getUserMedia – Allows a web browser to access the camera and microphone and to capture media.
- RTCPeerConnection – Sets up audio/video calls.
- RTCDataChannel – Allows browsers to share data via peer-to-peer (P2P).
- XMPP - It is a communications protocol for message-oriented middleware based on XML. XMPP provides a general framework for messaging across a network. It is pretty much the same piece of technology as the one Google uses for Hangouts.
- Colibri (Conferences with Lightweight Bridging) protocol:It is a protocol which helps in outsourcing the responsibility of relaying the media. The goal is to make use of remote server as if it was available locally.
How Jitsi works ?

- Access Layer : Web browser, which has a Jitsi Meet application executing in it.
- Application Layer : Jicofo, which provides basic signalling service, load balancing etc.
- Media Layer : Jitsi Video-bridge, which relays the video streams and is a selective forwarding unit (SFU).
Main Application components:
Jitsi MeetThis component provides the JavaScript application embedded with WebRTC capabilities. It’s responsibilities are:
- Making a layer for XMPP signaling.
- Initiating connection with the peer.
- Accepting media/ messages and files.
Once the application starts executing and the signaling is handled, user is able to communicate via Jicofo as it is responsible for signaling and relaying of the video-bridge. Jitsi meet is built over Lib-Jitsi which gives a full-fledged access to numerous other APIs that can give user more control over a video conference.
JICOFO : Jitsi Conference Focus
An agent responsible for making sure that media sent from one participant is distributed to all other participants in a conference, so that everyone could effectively hear or see everyone else. It is the main coordinating entity which manages all the ongoing conferences. When a conference is initiated, a room is made and anybody knowing the name of the room can enter the room,responsibilities:
- Managing conferences : who joins the room, who is leaving the room.
- Managing Colibri channels for participants and establishing media flow to-fro JVB.
- Jitsi Video Bridge load balancing based on conference count.
- Handling client authentication (optional).
- Taking part in implementation of some features like audio muting, recording etc. Jicofo is the central signaling component in the system.
JVB : Jitsi Video Bridge
Jitsi Video-bridge acts as a media server in the Jitsi infrastructure. This is the core of the system. It uses SFU(Selective Forwarding Units) as a media distribution method. In this, end-points i.e the participants send their streams to the central point(video-bridge server) and the video-bridge relays the video stream to other participants in the conference. It does relaying rather than mixing the video streams.
Benefit of relaying over mixing (SFU v/s MCU):
Video content mixing/ MCU(Multi-point control unit) : In this the video streams received are first decoded, composed into a mix and then encoded again. This not only reduces the quality of the video due to lossy encoding but also increases the processing load on the media mixer exponentially. Most of the Proprietary Video Conferencing Solution Like Polycom , CISCO Use it.
Video content relaying/SFU(Selective Forwarding Unit) : In this the video streams received by the media mixer are relayed to the participants of the conference.

- I need to write some script to make a normal shutdown hot key which may cost another 50 Rs.
Will update the blog then.
Written By
- Vinod Kotiya


Comments
You can find HDMI cable adapter ring at best deal. Visit https://rf-av.com/
Also, good find with jitsi, I was trying zoom but the need to download an app make it not work.
Learn here
How Can I Recover My Locked Facebook Account?
SIMPLE WAYS TO UNLOCK A LOCKED FACEBOOK ACCOUNT
What is the Best Way to recover a hacked Facebook account without email?
How Do I Fix When videos are not playing on YouTube?
https://www.party.biz/blogs/57930/64166/top-ways-to-solve-facebook-not-responding-issue?
Temporarily Locked Facebook Account: How to fix it?
Why can't I access my Facebook app?
Also check Vital Strategies to Follow for Systematic Research Work
Used Engine: How to Find a Junkyard Engine
How to Find the Best Aftermarket Parts
disabled Facebook account
disabled Facebook account
Recover a Deleted Facebook Page
Facebook page has been deleted
Manga Stream App
Animeultima
AnimeUltima.tv
MangaStream alternatives
Kisscartoon's real website
Kisscartoon for tv Shows
Compuserve email login
Tamilrockers
Compuserve webmail login
Manga Stream App
Animeultima
AnimeUltima.tv
MangaStream alternatives
Kisscartoon's real website
Kisscartoon for tv Shows
Compuserve email login
Tamilrockers
Compuserve webmail login
Animeultima
AnimeUltima.tv
MangaStream alternatives
Kisscartoon's real website
Kisscartoon for tv Shows
Compuserve email login
Nice Information
Facebook Messenger isn't working on your phone?
Free email sign up without phone number?
Youtube Keeps Stopping
YouTube keeps pausing
Instagram Login Activity
email that doesn't require phone number
FB Messenger not working
how to transfer all of your Emails from one Gmail to another
Whatsapp browser
Whatsapp web
Yahoo chat room
recover deleted Facebook page
Verizon email login
Comcast email login issues
delhi-to-jaipur-tour-package?
aulituourpackage
jaipur-places-for-honeymoon
delhi-tour-package-offers-great-value
Top-5-Delhi-Darshan-Places
Explore-the-Wonders-of-the-Himalayas-From-Delhi-Or-Chandigarh-Manali-Tour-Package
book-auli-tour-package-from-delhi-book-auli-package
hide text messages iphone
tap to load
aol mail attachment problems
how to recover permanently deleted messages on messenger
how to recover permanently deleted messages on messenger
how to recover a deleted Facebook account
Recover deleted Facebook account
Hemp Backpacks Wholesale
Eco Friendly Tote Bags
How long do short people live 12-15
How long do short people live tiktok
How to lower Cortisol neturally
What is cortisol